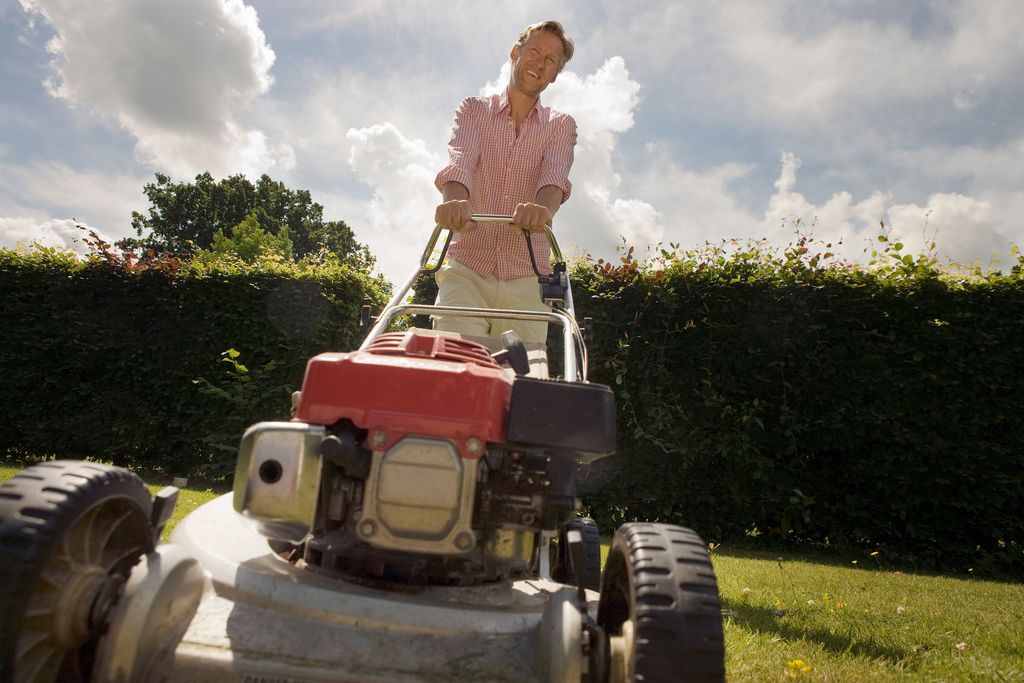
Is your lawn not as healthy as it looks?
I’ve been there—doing everything by the book: watering, fertilizing, mowing on schedule—but still not getting that lush, green carpet of grass I was hoping for.
If you’re in the same boat, the issue might be something you can’t see right away: thatch buildup.
Dethatching is a key lawn care practice that’s often overlooked, but it’s essential for keeping your grass healthy.
By removing the layer of dead grass, roots, and organic debris that builds up over time, dethatching allows your lawn to “breathe” and take in nutrients more effectively.
In this post, I’ll walk you through what dethatching is, why it’s so important, and how you can tell if your lawn needs it.
Together, we’ll make your grass look great again!
This post contains affiliate links. As an Amazon Associate, I earn from qualifying purchases at no additional cost to you.
What is Dethatching?
Dethatching is the process of removing the layer of dead grass, roots, and organic debris—known as thatch—that sits between the soil and the grass blades.
This layer builds up over time and can act like a barrier, preventing water, air, and nutrients from reaching the roots of your grass.
Think of it like a thatched roof on a house—while it can provide some protection, too much of it and nothing can get through.
How Thatch Forms
Thatch naturally accumulates from organic materials, such as:
- Dead grass blades
- Grass clippings
- Roots that don’t break down as quickly as they should
While mowing and watering your lawn, these materials start to pile up.
Under normal circumstances, microorganisms in the soil break down this debris, but when the buildup outpaces the breakdown, thatch forms.
When Thatch Becomes a Problem
A little bit of thatch can actually be beneficial.
It helps protect the roots from temperature extremes and can hold in moisture.
However, when thatch gets too thick, it becomes problematic.
Here’s how to know when it’s too much:
| Grass Type | Ideal Thatch Thickness | Problematic Thatch Thickness |
|---|---|---|
| Cool-Season Grasses | Up to ⅓ inch | More than ⅓ inch |
| Warm-Season Grasses | Up to ½ inch | More than ½ inch |
When the thatch layer exceeds these thicknesses, it can start to suffocate your lawn.
Water and nutrients can’t reach the soil effectively, and the grass roots struggle to grow deep, making your lawn more vulnerable to drought, disease, and pests.
So, while a thin layer of thatch can offer some benefits, too much of it can create serious problems for your lawn’s health—and that’s where dethatching comes in!
Why is Dethatching Necessary?
You might be wondering why dethatching is such a big deal.
After all, if you can’t see the thatch, it doesn’t seem like much of a problem, right?
Actually, thick thatch can cause a whole range of issues that can quietly harm your lawn.
Here’s why dethatching is necessary to keep your grass healthy and thriving:
Improved Air Circulation
One of the main benefits of dethatching is improved airflow to your lawn’s roots.
When thatch builds up, it essentially creates a barrier that blocks air from reaching the soil.
Your grass roots need oxygen to thrive, and without it, the grass can suffocate.
Removing excess thatch allows air to circulate freely, which is critical for healthy grass growth.
Why this matters:
- Healthy roots mean healthier grass.
- Proper air circulation helps prevent diseases that thrive in damp, airless conditions.
Enhanced Water Absorption
Thick thatch can also act like a sponge, soaking up water before it reaches the soil.
This can cause water to run off the surface, leaving parts of your lawn dry and thirsty.
After dethatching, water is able to penetrate the soil more effectively, hydrating your lawn from the roots up.
Key benefits:
- Water penetrates the soil more easily.
- Less water wasted through runoff.
- Your lawn stays hydrated longer between waterings.
Better Nutrient Uptake
When you fertilize your lawn, you want those nutrients to go straight to the roots.
But if there’s a thick layer of thatch in the way, those nutrients get stuck in the thatch instead of reaching the soil where they’re needed.
Dethatching clears the path for nutrients to reach the roots quickly and efficiently.
What this does:
- Ensures fertilizers work as they should.
- Maximizes the effectiveness of your lawn care efforts.
- Leads to thicker, greener grass.
Stronger Roots
When grass roots can grow deep into the soil, the entire lawn becomes stronger and more resilient.
Thatch acts like a barrier, forcing grass roots to grow shallow, which makes your lawn vulnerable to drought, pests, and diseases.
Dethatching gives your grass room to breathe and allows roots to grow deeper.
Why deeper roots are better:
- Your lawn becomes more drought-resistant.
- Stronger roots help the grass recover faster from stress like heat or heavy foot traffic.
- Your grass becomes more resilient to pests and diseases.
Reduced Soil Compaction
Dethatching also helps alleviate soil compaction, which is when the soil becomes too dense for roots to spread.
This is especially effective when combined with aeration.
Removing thatch and loosening compacted soil creates the ideal environment for roots to expand and thrive.
How it helps:
- Improved root growth and expansion.
- Easier for nutrients and water to move through the soil.
- Healthier, thicker grass that can stand up to heavy use.
In short, dethatching is essential for improving air circulation, water absorption, nutrient uptake, root strength, and reducing soil compaction.
All of these benefits work together to create a healthier, greener, and more resilient lawn!
Signs Your Lawn Needs Dethatching
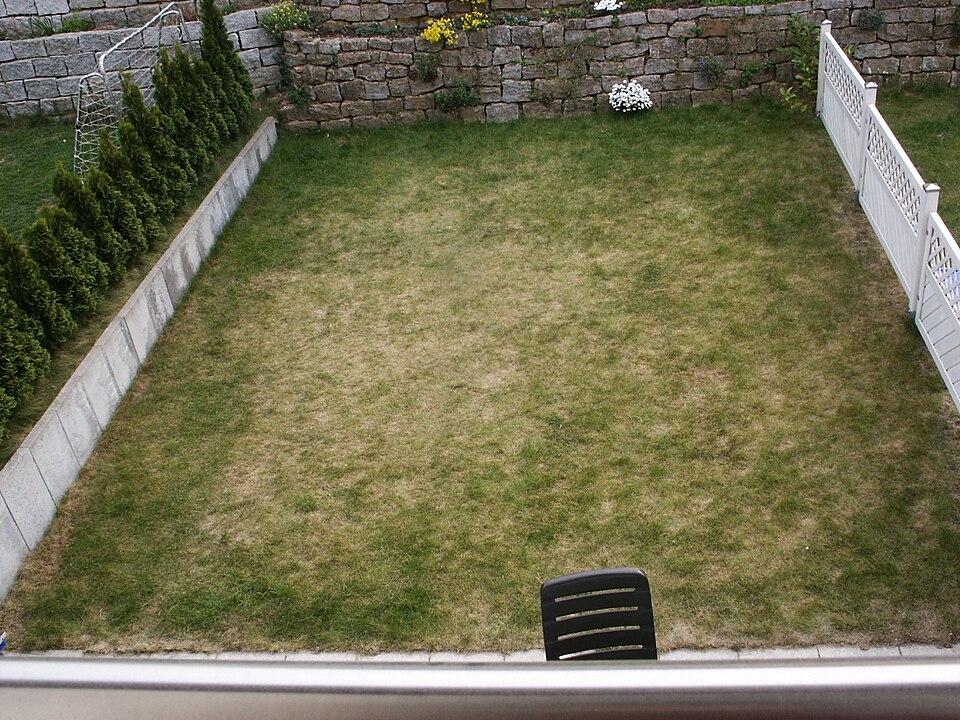
You might be wondering, “How do I know if my lawn needs dethatching?”
There are some pretty clear signs that your grass is struggling because of excessive thatch.
Let me break down what to look for:
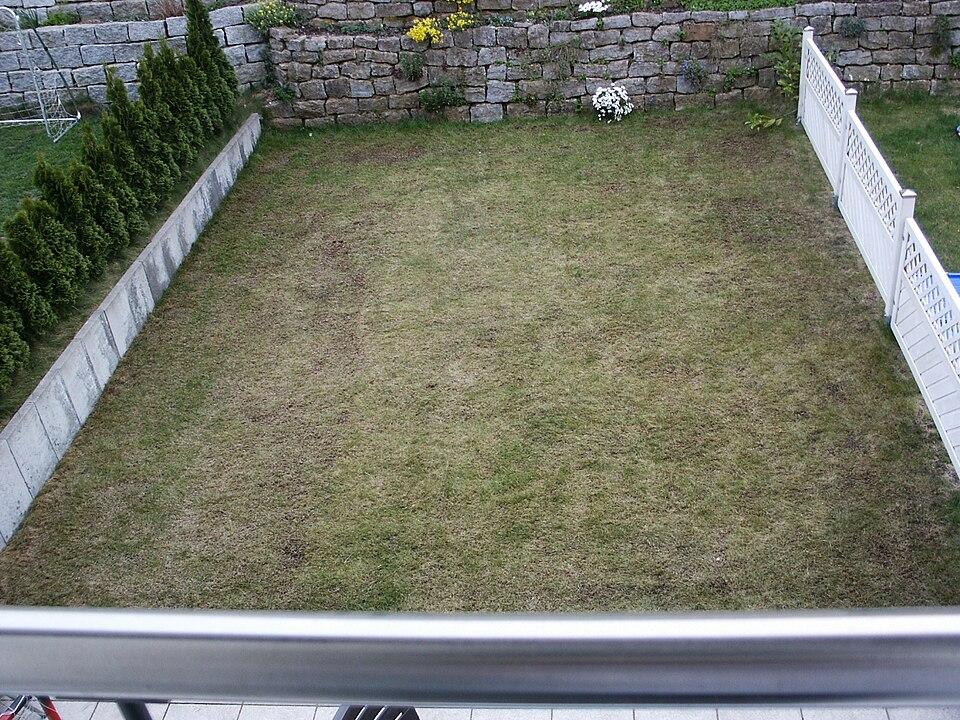
Spongy or Springy Texture
One of the easiest ways to tell if you have a thick layer of thatch is by how your lawn feels underfoot.
Walk across your yard and notice the texture.
If it feels spongy or springy, like you’re walking on a soft mat, there’s a good chance you’ve got too much thatch built up.
What this means:
- Thatch acts like a cushion, but in excess, it suffocates your grass.
- Your lawn is literally standing on a barrier that blocks water and nutrients.
Weak or Thin Grass
Are there areas in your lawn where the grass just looks weak or thin, no matter what you do?
If your grass is struggling to grow and looks patchy or pale, thick thatch might be the culprit.
That barrier of dead material can block essential nutrients from reaching the roots, causing the grass to starve, even if you’re fertilizing.
Why this happens:
- Thatch blocks fertilizers from getting to the roots.
- The grass can’t absorb the nutrients it needs to thrive.
Increased Weed Growth
Weeds love thick thatch because it creates the perfect environment for them to take root.
When your grass is weak due to lack of air, water, and nutrients, weeds can easily move in and take over.
So, if you’re seeing an uptick in weed growth, it’s possible that your lawn is suffering from too much thatch.
Signs to watch for:
- More weeds popping up in thin or bare patches.
- Grass looking unhealthy while weeds seem to thrive.
Poor Water Absorption
Another big sign that your lawn may need dethatching is poor water absorption.
If you notice water pooling on the surface of your lawn or running off instead of soaking into the ground, thick thatch could be to blame.
That top layer of organic debris can prevent water from reaching the soil, leaving your grass thirsty.
What to look for:
- Water sitting on the surface after watering or rain.
- Dry, brown patches because the water can’t get through.
Minimal Grass Growth Despite Care
You’re doing everything right—watering, fertilizing, mowing—and still, your lawn just isn’t growing as fast or as thick as it should.
Sound familiar? When grass growth is slow or stunted despite regular care, it’s often a sign that there’s a barrier (thatch!) blocking all your hard work from paying off.
Why this happens:
- Thatch prevents nutrients and water from reaching the roots.
- Grass struggles to grow even with proper care.
If your lawn is showing one or more of these signs, it’s probably time to think about dethatching.
By recognizing the symptoms early, you can take action before your lawn’s health deteriorates further.
Best Practices for Dethatching
Dethatching can make a world of difference for your lawn, but timing and technique are everything.
If you do it at the wrong time or in the wrong way, you can stress out your grass and set it back instead of helping it thrive.
Let’s dive into the best practices for dethatching to get it right.
Timing: When Should I Dethatch?
The best time to dethatch depends on the type of grass you have.
Grass types fall into two broad categories: cool-season and warm-season grasses, and each one has its ideal dethatching window.
- Cool-Season Grasses (like Kentucky bluegrass, fescue, or ryegrass):
- Best Time: Early spring or late summer to early fall.
- These grasses are actively growing during cooler weather, which means they’ll recover faster after dethatching if you do it during these times.
- Warm-Season Grasses (such as Bermuda grass, St. Augustine, or zoysia):
- Best Time: Late spring to early summer.
- These grasses grow best in warmer weather, so you want to dethatch just before or during their peak growth period to help them bounce back quickly.
Avoiding Stressful Conditions
One thing I’ve learned the hard way is that dethatching at the wrong time can actually harm your lawn.
There are certain periods when your grass is already under stress, and dethatching during those times can make things worse.
- Avoid Extreme Heat: Dethatching in the middle of summer heat is a no-go. The grass is already dealing with heat stress, and tearing up the thatch layer can make it dry out and weaken.
- Avoid Drought: If your lawn is struggling to get enough water, it’s best to hold off on dethatching until it’s better hydrated.
- Avoid Dormancy: Grass goes dormant in the winter and, for some types, during the hottest part of summer. Dethatching when the grass isn’t actively growing can slow down its recovery time and leave your lawn exposed to damage.
Frequency: How Often Should I Dethatch?
Now, you don’t need to dethatch every year—it really depends on how quickly thatch builds up in your lawn.
The general rule of thumb is to dethatch every few years or as needed based on your lawn’s health.
Here’s how to gauge it:
- Measure the Thatch Layer: You can check for excessive thatch by digging up a small section of your lawn and measuring the thickness of the thatch layer.
- For cool-season grasses, if the thatch is more than ⅓ inch thick, it’s time to dethatch.
- For warm-season grasses, anything thicker than ½ inch means dethatching is necessary.
- Keep an Eye on Lawn Health: If you notice any of the signs we talked about earlier (spongy texture, weak grass, poor water absorption, etc.), it’s a good idea to consider dethatching, even if you haven’t reached that critical thatch thickness yet.
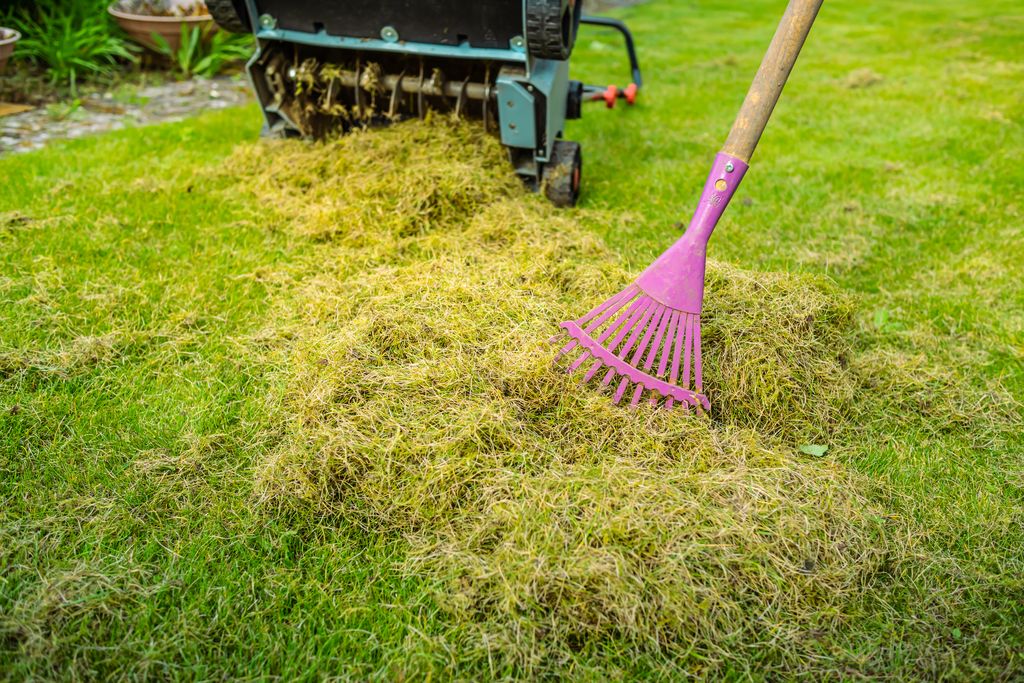
Tools for Dethatching
When it comes to dethatching, using the right tool makes all the difference.
Depending on the size of your lawn and how thick the thatch layer is, you’ll want to choose the best tool for the job.
Let’s break down your options:
Manual Dethatching Rakes
For small lawns with light thatch buildup, a manual dethatching rake can get the job done without much fuss.
It’s simple, inexpensive, and effective for areas that don’t need a ton of work.
- Best for: Small lawns (think less than 1,000 square feet) or spot-treating areas with light thatch.
- How it works: A dethatching rake has sharp tines designed to pull up thatch as you rake it across the grass.
- Pros:
- Affordable and easy to find.
- No need for electricity or gas.
- Ideal for small areas.
- Cons:
- Labor-intensive (you’ll definitely feel it in your arms and back).
- Not great for larger lawns or thick thatch.
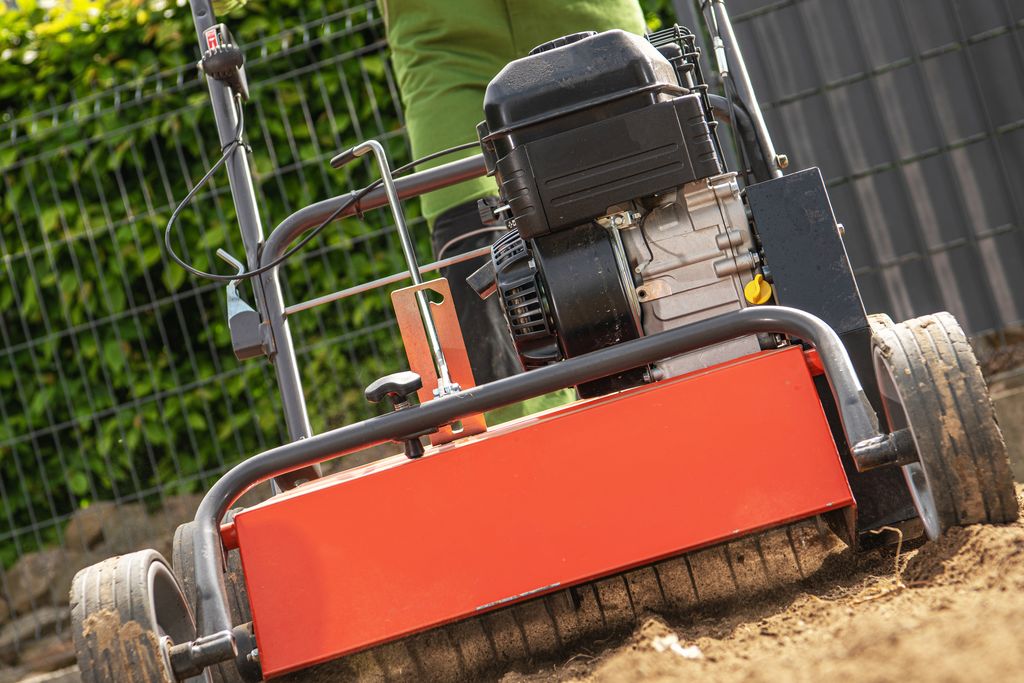
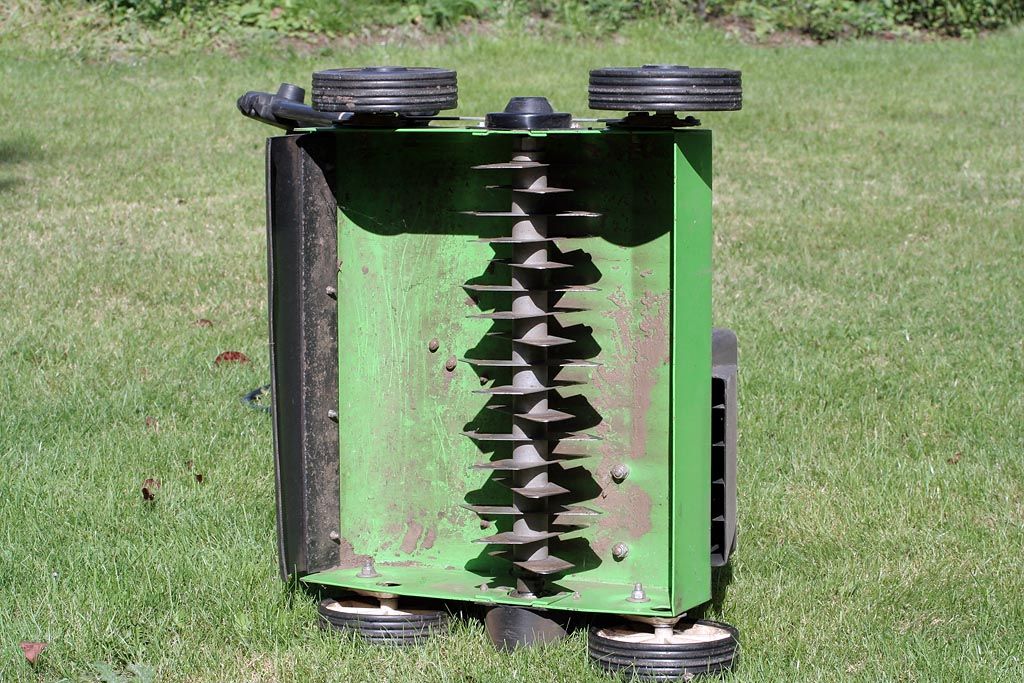
Power Dethatchers
If you have a medium to large lawn or a thicker layer of thatch, a power dethatcher (also known as a lawn dethatcher or dethatching machine) is your best bet.
These machines use motorized tines or blades to comb through the lawn and pull up thatch efficiently.
- Best for: Medium to large lawns (1,000+ square feet) with moderate thatch buildup.
- How it works: The power dethatcher’s tines rotate quickly, pulling up thatch as you push the machine across the lawn—much like using a lawnmower.
- Pros:
- Saves time and effort compared to manual raking.
- Great for covering larger areas.
- Most models allow for adjustable depth, so you can control how much thatch you remove.
- Cons:
- Can be more expensive than a manual rake.
- Requires electricity or gas.
- You may need to rent one if you don’t dethatch often enough to justify buying.
Vertical Mowers (Verti-Cutters)
For lawns with thick thatch or larger properties, a vertical mower (also called a verti-cutter) is the heavy-duty option.
These machines are designed to handle dense thatch and are often used by professionals for commercial properties or large estates.
- Best for: Large properties or lawns with thick thatch layers requiring serious removal.
- How it works: Unlike a power dethatcher, a vertical mower uses vertical blades to slice through the thatch and soil, cutting it up and pulling it out of the lawn.
- Pros:
- Extremely effective at removing thick, tough thatch.
- Ideal for heavy-duty jobs or large areas.
- Cons:
- Expensive to buy (but can usually be rented from garden centers).
- May cause more damage to the lawn if not used carefully.
- Overkill for smaller lawns or light thatch.
Choosing the Right Tool
Here’s a quick comparison to help you decide which tool is right for you:
| Tool | Best For | Pros | Cons |
|---|---|---|---|
| Manual Dethatching Rake | Small lawns, light thatch | Affordable, no fuel needed | Labor-intensive, not for large lawns |
| Power Dethatcher | Medium to large lawns, moderate thatch | Fast, efficient, adjustable depth | More expensive, needs fuel or electricity |
| Vertical Mower | Large properties, thick thatch | Highly effective for dense thatch, heavy-duty | Expensive, can be harsh on the lawn, best for pros |
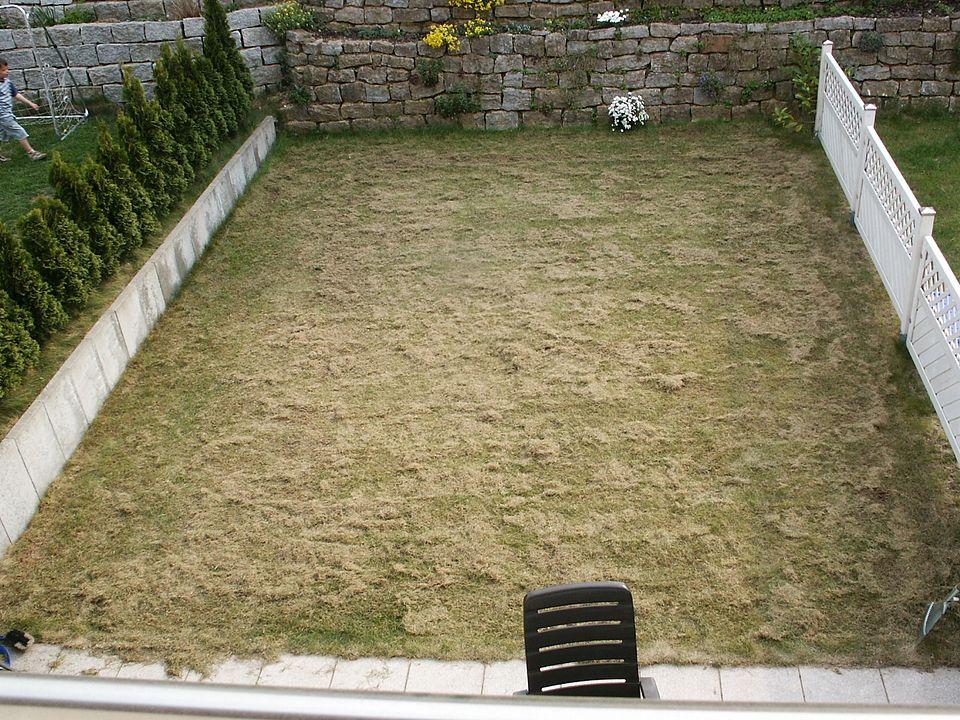
How to Dethatch Your Lawn
Now that you know why dethatching is important and what tools to use, let’s talk about how to dethatch your lawn.
It’s not as complicated as it sounds, and with a little preparation and the right steps, you can get your lawn back in top shape in no time.
Here’s a step-by-step guide to help you through the process.
Preparation: Getting Your Lawn Ready
Before you start dethatching, it’s important to prep your lawn so the process goes smoothly and causes as little stress to your grass as possible.
Here’s how I prepare my lawn for dethatching:
- Water the Lawn the Day Before:
- Watering the lawn the day before dethatching is crucial. You don’t want the soil to be soggy, but you also don’t want it to be dry and hard.
- The goal is to soften the thatch layer just enough so it’s easier to pull up without tearing too much at the healthy grass.
- Mow the Lawn:
- Give your lawn a good mow before you dethatch. Keep the grass a bit shorter than usual, but don’t scalp it.
- This will make the dethatching process easier and help you access the thatch layer more effectively.
- Mark Obstacles:
- If you have sprinklers, garden beds, or any other obstacles, make sure to mark them with flags or something visible so you don’t accidentally damage them.
What Tool to Choose?
Depending on the size of your lawn and the thickness of your thatch, you’ll want to choose the right tool for the job:
- For Small Lawns with Light Thatch: I’d go with a manual dethatching rake. It’s labor-intensive, but if you’re dealing with a small yard, it’s cost-effective and simple to use.
- For Medium to Large Lawns with Moderate Thatch: A power dethatcher is your best bet. It’ll save you time and energy and is perfect for medium to large lawns where a manual rake would be too much work.
- For Large Properties or Thick Thatch: If you’re dealing with really thick thatch or a large area, you’ll want to rent a vertical mower (verti-cutter). It’s the most powerful option, but also requires some care to avoid damaging your lawn if not used properly.
Here’s a quick reminder to help you pick the right tool:
| Tool | Lawn Size | Thatch Thickness |
|---|---|---|
| Manual Dethatching Rake | Small (less than 1,000 sq ft) | Light (less than ½ inch) |
| Power Dethatcher | Medium to large | Moderate (½ inch thick) |
| Vertical Mower | Large properties | Thick (over ½ inch) |
Post-Dethatching Care: Help Your Lawn Recover
After you’ve dethatched your lawn, your grass will likely look a little rough, but don’t worry!
That’s completely normal.
The key now is to help your lawn recover and thrive with a little post-dethatching care:
- Fertilize:
- Right after dethatching, I always apply a good-quality fertilizer to give the grass an extra boost. Since the soil is now more exposed and ready to absorb nutrients, the fertilizer can reach the roots more easily and help your grass bounce back faster.
- Choose a balanced fertilizer or a starter fertilizer if you’re overseeding as well.
- Water:
- Give your lawn a deep watering right after dethatching. This will help settle the soil, reduce stress on the grass, and kickstart the recovery process.
- Make sure to keep the soil consistently moist over the next few weeks to encourage strong regrowth.
- Overseed (Optional):
- If your lawn has thin or bare spots after dethatching, this is a great time to overseed. The dethatching process creates the perfect conditions for new seeds to settle into the soil, so if your lawn could use some extra thickness, now’s your chance to overseed.
- Aerate (Optional):
- Dethatching and aerating go hand-in-hand for many lawns. If your soil is compacted, aerating right after dethatching will further improve root growth and help your grass recover even faster.
- Aeration involves poking small holes in the soil to allow water, air, and nutrients to penetrate deeper into the ground.
Conclusion
Dethatching is one of those often overlooked but absolutely essential parts of maintaining a healthy, vibrant lawn.
The key takeaway here is that dethatching isn’t something you need to do all the time, but when it’s necessary, it makes a world of difference.
Regularly checking your lawn’s thatch layer and following best practices can ensure that your grass stays lush and thriving throughout the year.
If you think your lawn could use some dethatching, why not give it a try? Your lawn will thank you, and you’ll love the results.
And while you’re at it, feel free to check out more of my lawn care tips on the blog—I’ve got plenty of advice to help you achieve the lawn of your dreams.